Saturday, 18 October 2014

'Verbes indicatif présent' free download

I'm trying to encourage my 9 yr old boy to learn his french verbs.  He's not inspired, Only MINECRAFT !  can get his full attention :)

Soooooo I created these letter-sized 'posters' to hang in his room over his desk.  My thinking is that if the Minecraftia font doesn't get his attention, nothing will.

And I was right, he's reading them.  They're in view and he's interested.  Now to see if his marks go up a little :)

Thank you Minecraftia, by Andrew Tyler !

You can look up the different classifications of french verbs (1st group, 2nd group, 3rd group, radical, stable, etc) in english, here.

You can download my 'posters' here by clicking on whichever verb.  For 2$ you can order custom fonts or colors, please leave a message in the comment section below.

Conjugaison de verbes en français

Futur Simple
Avoir (est un verbe auxiliaire qui fait parti du 3e groupe)
Être (est un verbe auxiliaire qui fait parti du 3e groupe)


Infinitif pésent 
Avoir (est un verbe auxiliaire qui fait parti du 3e groupe)

Être (est un verbe auxiliaire qui fait parti du 3e groupe)


1er groupe
Verbe en -er, radical stable

Verbe en -er, radical variable


2e groupe
Verbe en -ir, radical stable (participe présent - issant)

Verbe en -ir, radical variable (participe présent - ant)


3e groupe
Verbe en -re, radical variable

Verbe en -re, radical stable


Verbes en -oir, radical variable

Verbe en -tre, radical stable


Verbe en -tre, radical variable


Wednesday, 26 March 2014

Numbers - 1 to 100 in french


While helping my youngest with his (gr 1) homework this evening I realized he needed some serious help with his numbers from 1 to 100 in french.  He has difficulty with 7, 9, the teens, the seventies and the nineties. So I thought I'd whip him up a little reminder page.  Well little did I know that I didn't really know how to spell some myself and was ignorant of new spelling rules in effect (old spelling and new spelling are both accepted as of the date of this article). So I looked them all up and here they are:

0 zéro
1 un
2 deux
3 trois
4 quatre
5 cinq
6 six
7 sept
8 huit
9 neuf

10 dix
11 onze
12 douze
13 treize
14 quatorze
15 quinze
16 seize
17 dix-sept
18 dix-huit
19 dix-neuf

Nouvelle orthographe: Les numéraux composés sont systématiquement reliés par des traits d’union, y compris ceux formés avec million, milliard, trillion, etc. (exemples : trente-et-un-mille-huit-cent-vingt-deux, deux-millions-sept-cent-mille, cent-deuxième, deux-cents quarts).  Office québécois de la langue française

New accepted spelling: Numbers formed by more than one number are systematically linked by a hyphen, including those formed with million, billion, trillion, etc. (examples: 
trente-et-un-mille-huit-cent-vingt-deux, deux-millions-sept-cent-mille, cent-deuxième, deux-cents quarts). Office québécois de la langue française

20 vingt
21 vingt-et-un  
22 vingt-deux
23 vingt-trois
24 vingt-quatre
25 vingt-cinq
26 vingt-six
27 vingt-sept
28 vingt-huit
29 vingt-neuf

30 trente
31 trente-et-un
32 trente-deux
33 trente-trois
34 trente-quatre
35 trente-cinq
36 trente-six
37 trente-sept
38 trente-huit
39 trente-neuf

40 quarante
41 quarante-et-un
42 quarante-deux
43 quarante-trois
44 quarante-quatre
45 quarante-cinq
46 quarante-six
47 quarante-sept
48 quarante-huit
49 quarante-neuf

50 cinquante
51 cinquante-et-un
52 cinquante-deux
53 cinquante-trois
54 cinquante-quatre
55 cinquante-cinq
56 cinquante-six
57 cinquante-sept
58 cinquante-huit
59 cinquante-neuf

60 soixante
61 soixante-et-un
62 soixante-deux
63 soixante-trois
64 soixante-quatre
65 soixante-cinq
66 soixante-six
67 soixante-sept
68 soixante-huit
69 soixante-neuf

70 soixante-dix
71 soixante-et-onze
72 soixante-douze
73 soixante-treize
74 soixante-quatorze
75 soixante-quinze
76 soixante-seize
77 soixante-dix-sept
78 soixante-dix-huit
79 soixante-dix-neuf

80 quatre-vingts 
*Vingt et cent prennent un 's' 'quand ils sont multipliés et qu'ils ne sont pas immédiatement suivis d'un autre déterminant numéral. Voir exemples des exceptions ici: Office québécois de la langue française

*Vingt and cent take an 's' when they are multiplied, and not immediately followed by another number. See examples of exceptions here: Office québécois de la langue française

81 quatre-vingt-un
82 quatre-vingt-deux
83 quatre-vingt-trois
84 quatre-vingt-quatre
85 quatre-vingt-cinq
86 quatre-vingt-six
87 quatre-vingt-sept
88 quatre-vingt-huit
89 quatre-vingt-neuf

90 quatre-vingt-dix
91 quatre-vingt-onze
92 quatre-vingt-douze
93 quatre-vingt-treize
94 quatre-vingt-quatorze
95 quatre-vingt-quinze
96 quatre-vingt-seize
97 quatre-vingt-dix-sept
98 quatre-vingt-dix-huit
99 quatre-vingt-dix-neuf


100 cent

Friday, 7 February 2014

'Spiked' child's neck warmer


A friend of my oldest son wanted a neck warmer after he saw the very simple quickie one I made for my son.  THAT was TWO years ago when they were in kindergarten. I FINALLY made it today....


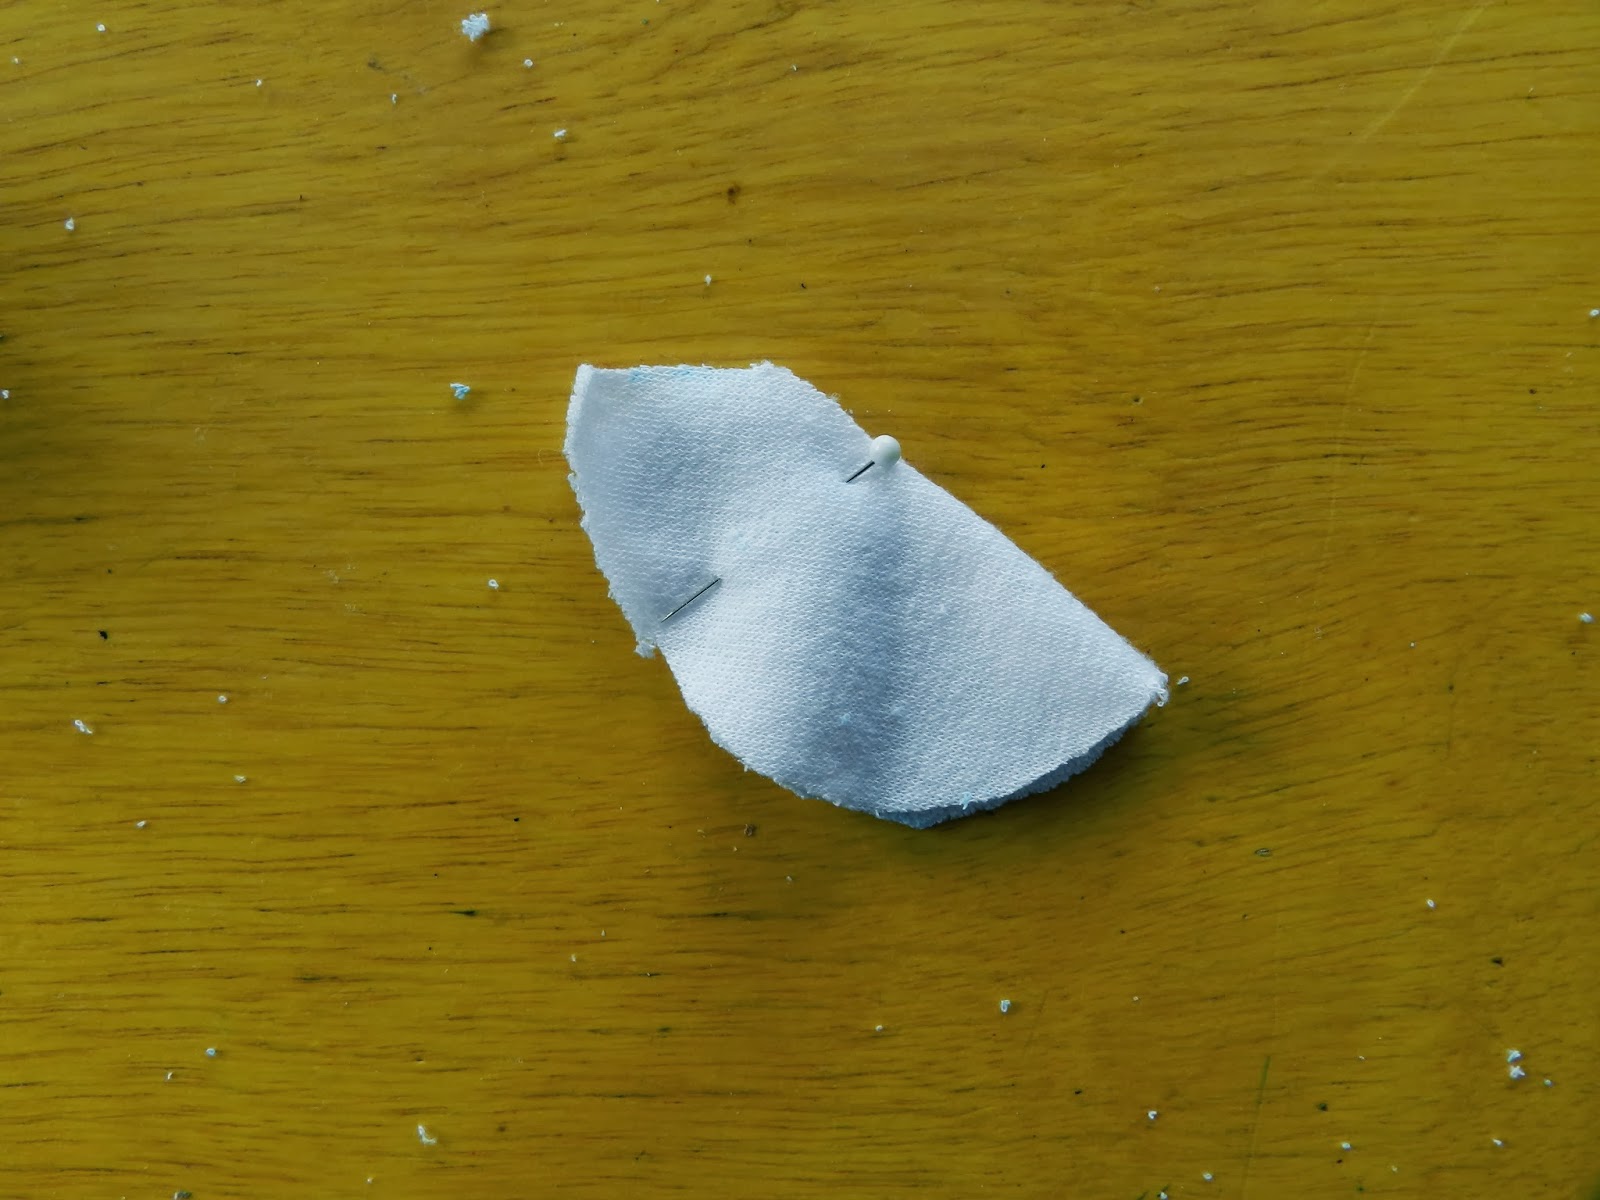
Started out by making a cone template for the 'spikes'.


Traced it onto a white terry cloth type fabric and cut out six at a time (I know I'm a rebel), but ended up using only 3.


You have to play around with this bit, I ended up lobbing off quite a bit of fabric to make them nearer the final size. Here I placed the pin to imitate a seam in order to gauge the end result (by turning it over, not shown)


 Figured out the size I wanted then folded it in two in order to see what excess fabric I needed to lob off.


Ready to sew (along line set by pin) RS together.


 Gratuitous shot of my sexy Necchi :)


I sewed the 'spikes' one after the other without clipping each afterwards. I find this goes faster and saves thread.


Unfortunately I don't have pics of next step, 'cause when you're winging it, well, you're winging it.  I cut out circles of the same fabric from the initial 'spike' template in order to make 'bottoms' for the 'spikes'.  I figured it woud be much easier at this point to add a bottom in order to sew the 'spikes' to the main fabric.

Sewing the bottoms RS together, leaving a small gap in order to turn it RS out.


Just like sewing a sleeve to a bodice. Around and around you go...


Stuffed the 'spike' with a little stuffing and hand sewed the gap.  The 'spikes' are pretty round but not entirely. It's okay though I'll fix that up when I sew the 'spikes' to the main fabric.


Set the 'spikes' on the main fabric spaced out evenly (or pretty close) at this point my boys are almost done school and I have to speed up :S 

Main fabric is 22 inches by 8 inches.  It's a size that works well for my boys, 8 yrs old and 6 yrs old.  It is a stretch fabric so will go over head easily even if it's a little smaller.  My boys heads are 22 inches in circumference approximately.

So you just hand sew these little 'spikes' to main fabric being careful not to allow for any puckering of the main fabric.


To assemble the pieces, I thought it much easier to diagram it out. This is one method that I call the lazy-girl method. The better method would probably be to sew smaller ends of main fabric together, smaller ends of secondary fabric together, insert main fabric tube into secondary fabric tube RS facing and sew along long sides leaving a small gap near the small side hem (or back if you prefer) to turn neck warmer RS out. Hand sew gap or overstitch both long sides 1/4 inch from sides.


P.S. Before the last step, I overstitched 1/4 inch from sides on both long sides.  

P.P.S. After you turn in the hem at last step, clip off excess fabric.  I forgot to mention it in the diagram and I almost forgot to do it in real life... Actually I did, but ripped up stitch and redid, there was just too much...

And TADA ! A 'studded' neck warmer for a little boy :)


This project took about 2 hours total, start to finish.

Saturday, 25 January 2014

Needed a knee patch, made a knee patch

My oldest is going through his track pants like there's no tomorrow. I'm tempted to go out and buy him some new ones but I've been wanting to make cool patches for awhile. Well the opportunity arose this morning so away I went.


First I asked my eldest what his favorite 'Trash Pack' of the day was...


I then drew it out with simple shapes and colored it.


I chose a variety of fabrics to match the drawing the best I could along with some interfacing to stabilize the softer fabrics.


Here I just finished sewing on the eyes.  Loved that my machine helped me through it. Yay :) Used a no-fray product on the edges to keep everything looking neat for as long as possible.


So here he is.  Did I mention that we're Saturday morning and that my time is limited before the underlings get needy ;) lol Skipped the arms and didn't have time to do the feet, but I did manage to find time in the day to embroider the yellow 'drool'.


And there it is, my first handmade patch :)  Fun. :)  I already know what my eldest will be wearing to school Monday morning :)

Monday, 13 January 2014

My first dress reconstruction


I found a dress at the thrift shop. It had a color I like, fabric I love (100% cotton) and it had a nice length. Apart from that I didn't like much else about it. I put it on my mannequin and stared at it for months....


For a housedress it's not so bad, but I'm not ready to do the housedress thing yet... I see 'dowdy' here.


I want to remove the collar and alter the neckline, make it more of a small scoop neckline. I see a japanese-style tunic in here.


Notice my seam ripper at the ready on the left ;)
Please note, my mannequin is a MALE store mannequin and does not have breasts lol


The back is okay, no alterations for now.


-Ripped out collar and eyeballed a new neckline (cut a little, tried it on, cut a little tried it on, etc.)

-Cut off sleeve cuffs and straps.

-Removed top pockets entirely.  I have little holes where the stitching was but I'm thinking about how to take the eye away from that :)

-Cut out front buttons and placket, sewed the two sides together. 

-Tried the dress on inside out (several times), pinched the excess fabric along princess seams from the breast apex* to the waist or to where the bottom pockets begin. Fortunately I won't have to remove the bottom pockets since the 'dart' tapers off to just above it. Ouf, that was close ;)  Pinched a little fabric in middle seam to avoid tummy pucker.

*I really fiddled with the princess seams and eventually had the seams go up past the apex nearly to where the sleeve meets the bodice. My next tunic with princess seams reconstruction, I'll probaly remove the sleeves at start to allow for room to manoeuver...


Pinched a little fabric in the back at the neck to create a dart that will eliminate the gap.


What happens when you don't have a proper dress mannequin... static hair !!


At this point, I'm working on the collar.  I tried bias tape...


...but I'm looking for a cleaner look.  Don't judge the princess seams 1) my tunic is on a male mannequin and 2) I had to really work on them as they were a challenge but I've come to appreciate the construction part of this type of 'architecture')...


So the bias tape didn't make the cut.


My son's cat keeping me company :)


I then thought to take the original collar fabric and make a type of bias interfacing type thing, but that didn't look good either.... However after a quick consult with my seamstress neighbor I settled on using the extra fabric as a real interfacing.and triple topstitching it into place. Very satisfied with my choice, glad I took my time and tried different variations.


The shortened sleeves with a nice triple topstitch. I like :)


Pur-ty :)

And here's the pretty-much-finished-but-still-undergoing-transformation tunic.


*sigh* I wish I'd cleaned the mirror before taking the pics...   

I'm wearing the tunic with the black and white horizontal striped leggings I made a few days ago that AREN'T FINISHED lol the hem on the ankle isn't done and I haven't even sewn in an elastic at the waist lol but I was too excited to wait :)  The tunic is made for warmer weather with a thinner shirt underneath or even nothing at all, but today it was -29C so turtleneck it is... 


Found a great pair of booties at the thrift shop (I tell you this thrift shop is magic, they always have what I need)...


After wearing the tunic all day I decided I need/want to cut a good 6 inches off the length, which I will proceed to do tomorrow.

I had a LOT of fun on this project, learned a lot of things.  I'm hoping I have time to delve into another project similar to this one soon :)  

If you have any questions, don't be shy ! They're probably the same questions I have lol we can figure it out together !


Monday, 19 September 2011

PC products I've come to enjoy

Here are a few President's Choice products that I've come to enjoy (for quality and especially price):


1) PC Blue Menu Celeb margarine is a decent replacement for Becel.  (Hey ! Celeb=Becel ! I just noticed...)


2) Tastes more like Tim Horton's coffee than Tim Horton's coffee : PC The Great Canadian Coffee


I'll keep updating this list as I discover new PC products.

First attempt at sewing autumn hats for the Boyzz

Here are pics of autumn hats I made for the Boyzz using the hoods from old hoodies that were too small.  Diagrams to follow.


My sewing logo :P


My relunctant model ;)

Scales are too low, get lost in jacket collar...


My very first hoody hat :)


....he's falling oveeeeerrr :)